Coody 13.6 Setup Guide
The Coody AirTent 13.6, also known as the Oliezi AirTent 140, offers exceptional versatility and comfort across various weather conditions. Equipped with a chimney hole for a wood stove to keep you warm in winter, and compatible with an AC or heater for cooling during summer, this tent is suited for all climates. Its spacious and durable design makes it an excellent choice for families or groups seeking a dependable, adaptable shelter year-round.
Table of Contents
- How Does It Compare With Other Tents?
- What Comes in the Package
- How to Setup the Coody 13.6
- Customizing the Doors and Windows
- Using the Rainfly as an Awning
- Deflating and Folding the Tent
- Installing AC Units
- Turning Your Coody 13.6 into a “Hot Tent”
- Care and Maintenance
- Repair and Patching the Airpoles
- On Condensation
- Manufacturer’s Notes
How Does It Compare With Other Tents?
Materials
The Coody 13.6 is constructed using two types of durable fabrics: the main tent is crafted from 210gsm TC Fabric, its floors from 550GSM PVC, while its rainfly is made from 420D Oxford Fabric.

TC Fabric
TC, or Polyester Cotton fabric, is a blend consisting of 65% polyester and 35% cotton. Polyester provides excellent durability, while cotton offers breathability. The Coody 13.6 has a TC Fabric rating of 210gsm or grams per square meter. Here, GSM is a measurement that indicates the weight of the fabric and reflects its thickness and density. A higher GSM number means a heavier and generally more durable fabric. This rating results in a tear-resistant fabric well-suited for outdoor use, offering enhanced breathability compared to fully synthetic fabrics, which helps minimize condensation inside the tent.

Oxford Fabric
The tent’s rainfly is made from Oxford fabric, a material known for being lightweight yet durable. Although it has excellent properties, it does not offer the same level of insulation and breathability as the TC (terylene cotton) fabric used in our standard AirTents, which are better suited for 4-season camping.

PVC
The Coody 13.6’s floor is made from 550GSM PVC. As said before, the higher the GSM rating, the more rugged and thicker it is. Having this high of a rating makes the 13.6’s floor as rugged as it could possibly be, making it able to withstand tears and water leakage.
Size & Dimensions
Once fully inflated, the Coody 13.6 has a floor area of 148 square feet (i.e., 142 x 150 inches).

On the other hand, the walls are 53 inches tall, with its peak height at 87 inches.

Once fully inflated, the Coody 13.6 can fit up to 6 individuals.
Applicable for All Seasons
The Coody 13.6 distinguishes itself by featuring TC (terylene cotton) Cotton Fabric, known for its outstanding insulation and breathability.

For winter camping, we highly recommend installing an outdoor stove inside the Coody 13.6
This high-quality material makes these tents perfect for four-season camping. Compared to the lighter Oxford Fabric used in our Lite Series, the TC fabric strikes the ideal balance between warmth and ventilation, making it an excellent choice for outdoor enthusiasts who camp year-round. This tent is meticulously crafted for campers seeking top-tier comfort and protection in any season.
What Comes in the Package
The Coody 13.6 already comes with all the things you need to set up the tent conveniently. Below is a list of what’s included in the package:

- Air Tent - 210gsm TC Fabric (Terylene Cotton)
- 4x Clear Windows - TPU
- Rainfly - 420D Oxford Fabric
- Entry Mat - 550gsm PVC
- Manual Operated Air Pump
- 26x Stainless Steel Stakes
- 4x Guy Lines (3.5 meters)
- 6x Guy Lines (3 meters)
- 1x Patch Kit
- Carrying Bag for Tent
- Carrying Bag Accessories
How to Setup the Coody 13.6
The Coody 13.6 is simple to set up. For a quick guide, follow our step-by-step instructions below.
Step 1: Prepare Your Area

Choose a flat, dry location for your tent setup. The ground should be soft enough to allow easy insertion of stakes.
Step 2: Spread Your Footprint (Optional)
For added protection and to prevent water seepage during rain, we highly recommend using a ground sheet under your tent. Oliezi Outdoors offers compatible footprints for your tent here. Once in place, drape your tent over the sheet and secure it with the included stainless steel stakes.
Step 3: Locate the Intake Valve

Find the intake valve at the front corner of your tent’s door. This is where you will insert the nozzle of your pump.
Step 4: Inflate

Use the correct nozzle for the air intake valve (3.6 cm in diameter). Ensure a snug fit. Using the manual air pump included in the package, inflation will take approximately 60 pumps, or under 5 minutes. Alternatively, you can use our rechargeable air pump available here.
Customizing the Doors and Windows
All doors and windows are designed to be customizable with the Coody 13.6. These are all detachable, and you only need to zip them up to remove or install them to your tent. Below are some different door and window types that you might want to consider when setting up:
Front Door Types
The Coody 13.6 comes with three different front doors you can choose from. Here are some of our recommendations on how to use each door type.


Window Types
Similar to the front door, the Coody 13.6 comes with two different window types.


Using the Rainfly as an Awning
Note that the rainfly has multiple guy line points:

By extending it forward and using guy lines and poles (not included in the package), you can modify the rainfly to become an instant awning:

Important: you’ll need to use poles that can at least match the tent’s wall and peak roof height (53 and 87 inches, respectively).
Installing AC Units
The Coody 13.6 features a set of built-in AC ports that connect the inside of your tent to the air outside:

Using these ports would allow you to connect your own AC unit without having to make any further modifications in the tent:

Since there are different types of AC units, we recommend following your manufacturer's installation guide when setting it up in your tent.
Turning Your Coody 13.6 into a “Hot Tent”
It’s possible to install a stove inside your Coody 13.6, turning it into a “Hot Tent”. This tent comes with a built-in ceiling stove jack that you can use to install your stove’s ventilation:

Oliezi Outdoors also offers a window stove jack (not included) that swaps out with one of the windows, should your stove be of a different type:

Both jacks are around 6 inches in diameter. However, please follow your stove manufacturer’s instructions on how to safely install and operate it while inside the tent.
Deflating and Folding the Tent
When deflating your tent, slowly loosen the protective cap on the intake valve:

We do suggest not opening it up completely. Rather, a slow, steady trickle out of air is highly recommended to prevent your tent from collapsing abruptly.
Folding the tent for storage, on the other hand, is also easy. Please refer to the video below.
Care and Maintenance
All of our tents are made from durable fabric. However, proper maintenance will help maintain its durability. That said, after camping, make sure to spray some mild soapy water on your tent and wipe it with a clean, soft sponge. Let it air dry, disassemble, and then place it back in its storage container.
To prevent mold growth, always store your tent completely dry in a well-ventilated area. Avoid storing it while wet, as this can lead to mold and moisture buildup. Keep the tent away from open flames or heat sources to avoid fire hazards. If storing for a long period, ensure the tent is thoroughly dry. Regularly inspect your tent for damage or wear and address any issues promptly to extend its lifespan.
Repair and Patching the Air Poles
While it's unlikely, accidents can happen, and your tent’s air poles might get damaged. If that occurs, your tent includes a patch kit to repair any punctures.
Here's a step-by-step guide on how to patch your Air Poles:
- Clean the area that you're patching.
- Using a brush, apply glue to the affected area. Note that adding too much glue will cause issues in adhesion. Only apply a thin and even layer.
- Take out the PVC patch and also apply glue to it. Wait until the glue dries as applying the patch prematurely may not cause it to adhere well.
- Cut out the PVC patch to the desired size (should be larger than the hole).
- Place the PVC patch on the affected area and apply pressure. Make sure that the patch adheres to the Air Pole.
- With a drier, warm the repaired area and apply more pressure with a blunt and flat plate (do not use a knife).
- Let the patch dry until fully adhered to the Air Pole.
On Condensation
Our Coody tents are made from TC fabric. It’s more breathable than regular polyester, maintaining indoor comfort year-round.. Unlike 100% cotton, it also offers better everyday waterproofing, blending comfort and functionality. The tent's large windows also improve ventilation. That is why our tents are popular among campers as they help minimize condensation, especially during winter.
However, the weather is unpredictable and sometimes some form of condensation might occur. This is not a defect; as condensation is a natural phenomenon. When this happens, we suggest that you open up your windows to allow air in.
Manufacturer’s Notes
- During the first 2-3 uses, it may go through a seasoning process, which is the initial period where the cotton fibers expand and contract.
- The frequency of light and sunlight will enhance the waterproofness.
- Inspect the tent thoroughly after purchase and test its use before the initial use.
- Keep in mind that any external damage or defect may not be covered under warranty.
- When using the tent indoors, ensure adequate ventilation to avoid the risk of mold.
- Ensure that the zippers do not get caught when closing the tent to avoid damage.
- The tent is not designed for use in extreme weather conditions; use caution during severe weather.
Have More Questions? Send us an email!
Browse Other Categories
-
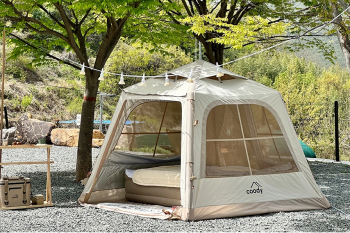
Coody AirTent Lite Series
Learn MoreSetup guides and more information about the Oliezi / Coody AirTent Lite Series.
-
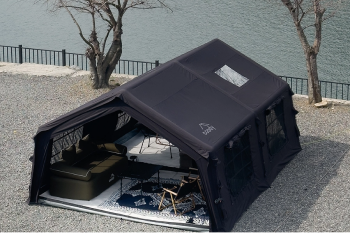
Coody AirTent Series
Learn MoreGuides and information about the Oliezi / Coody 5.3, 13.6, Familia and more.
-
-
-
THOR Storage & Accessories
Learn MoreProduct information and guides for various THOR boxes and accessories.
-
General Questions
Learn MoreQuestions on payment, delivery, returns and anything concerning shopping.


